

This blog post contains affiliate links. If you click my custom link to purchase a product, I’ll earn a commission at no extra cost to you. WIN!
BMW F30 & F32 Sticky Door Handle Replacement: The Ultimate Guide
If you own a BMW 3 Series (F30) or 4 Series (F32), you’ve likely experienced the dreaded "melting" interior door handles. This common issue turns your premium interior into a sticky mess. In this guide, we’ll explain why this happens and how to fix it permanently using high-quality aftermarket replacements.
Why are my BMW door handles sticky?
For nearly 20 years, BMW used a soft-touch rubber coating on interior handles to provide a "premium" feel. However, this material is prone to chemical breakdown.
Heat Exposure: High cabin temperatures accelerate the degradation of the rubber.
Skin Oils & Chemicals: Natural oils, sunscreens, and bug sprays act as solvents, liquefying the handle's surface.
The Result: A black, tar-like residue that sticks to your skin—often described as feeling like "cheap, wet toilet paper."
The Solution: OEM vs. Aftermarket Handles
While you could buy original equipment manufacturer (OEM) replacements, you’ll likely face the same issue again in a few years.
Pro Tip: To permanently solve the "melting" issue, switch to ABS Plastic handles.
In this guide, we are installing handles from Kies Motorsports. These feature the exact same fitment as the original BMW design but are constructed from solid ABS plastic. By removing the thick rubber layer, you ensure the handles stay smooth and dry for the life of the vehicle.
Replacing the handles
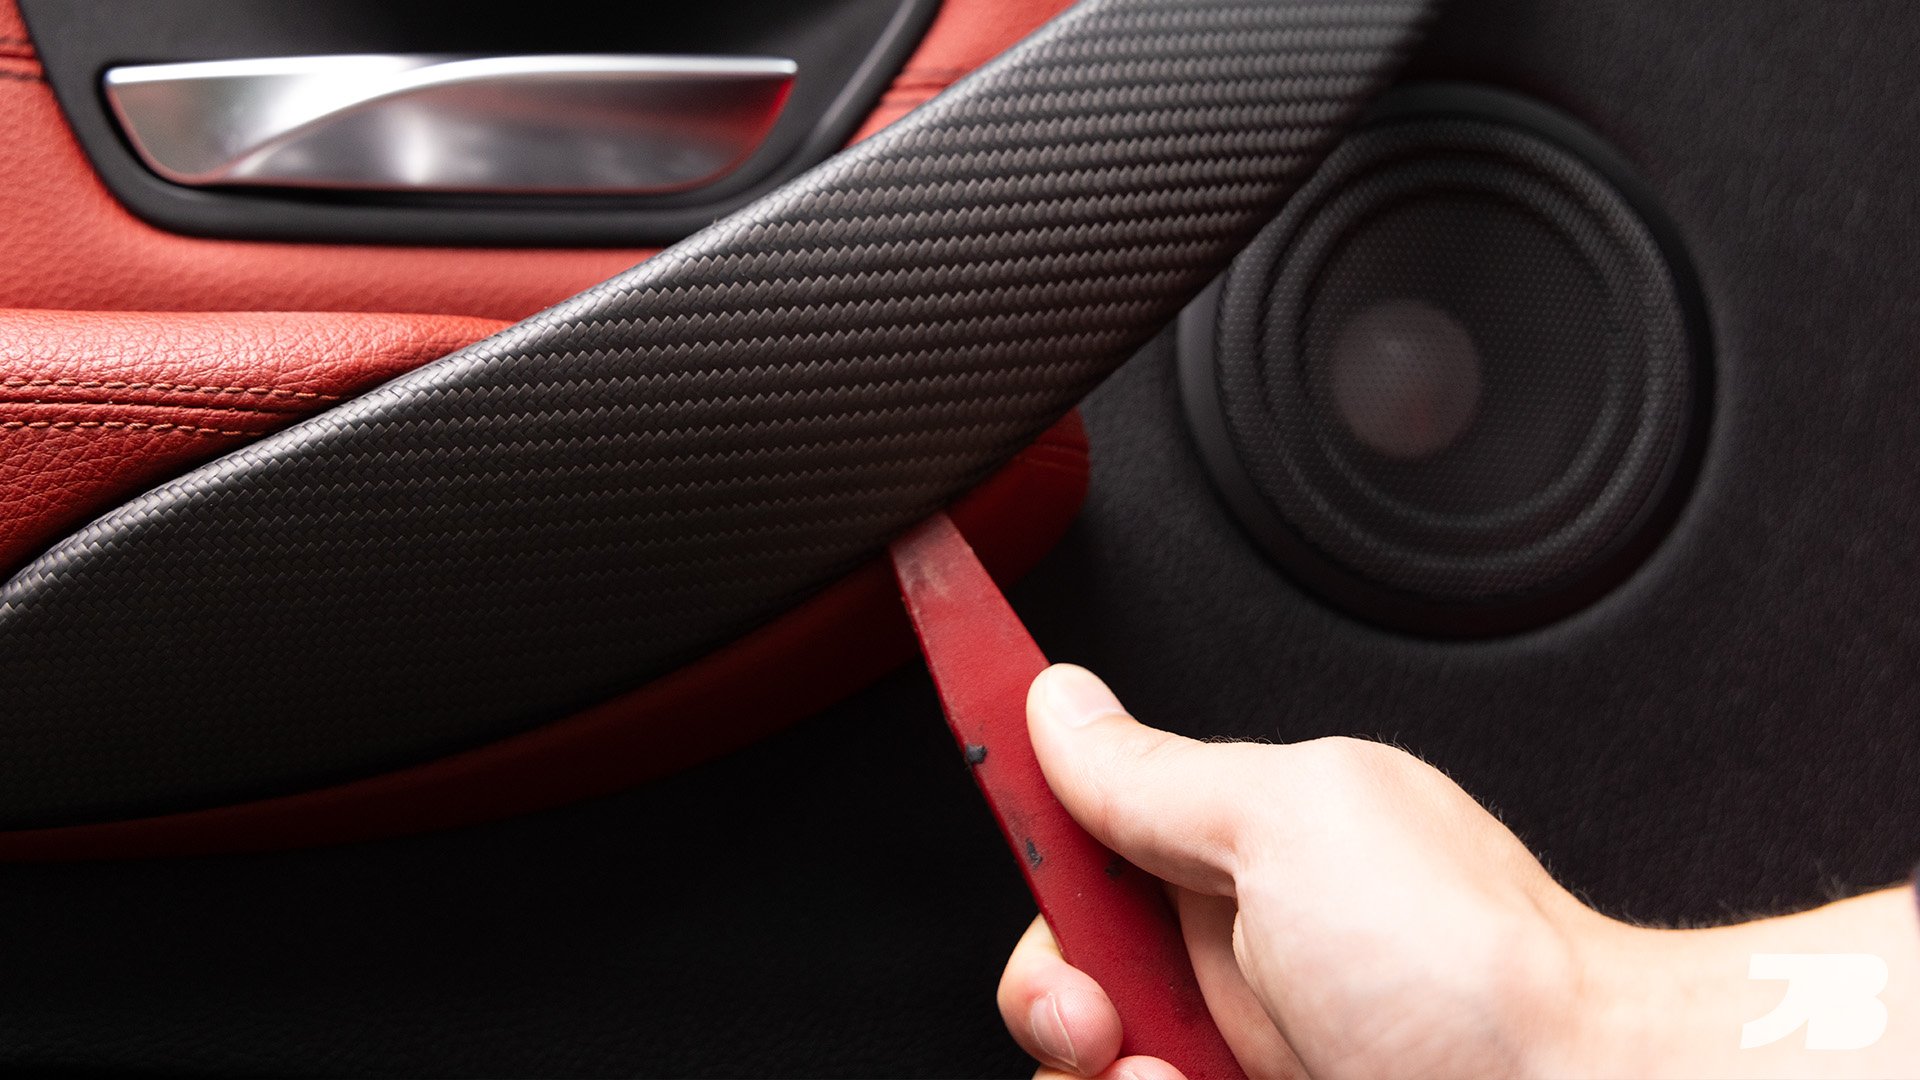
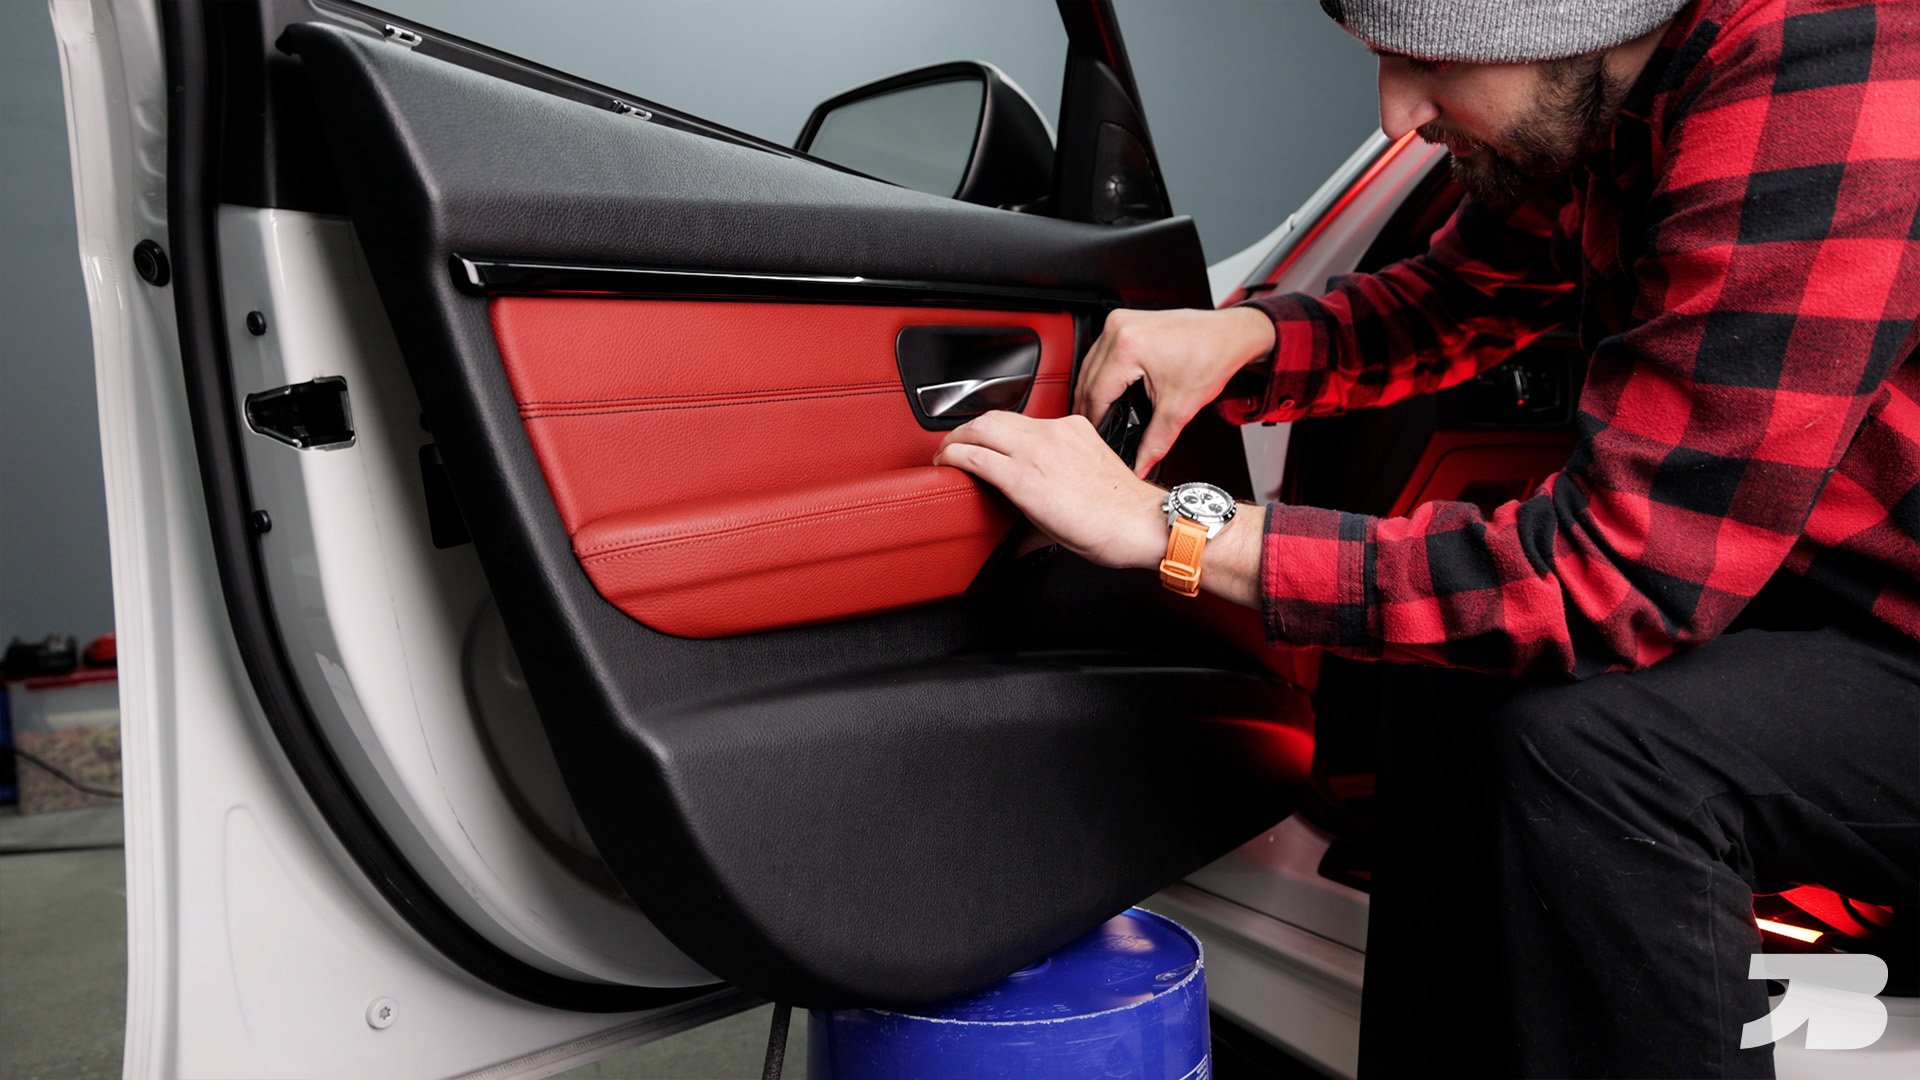
Step 1: Remove the trim cover. There is a notch under the door handle to fit an interior pry tool. Start in the middle, then work your way up the top. The trim hooks in at the top and slides in at the bottom.
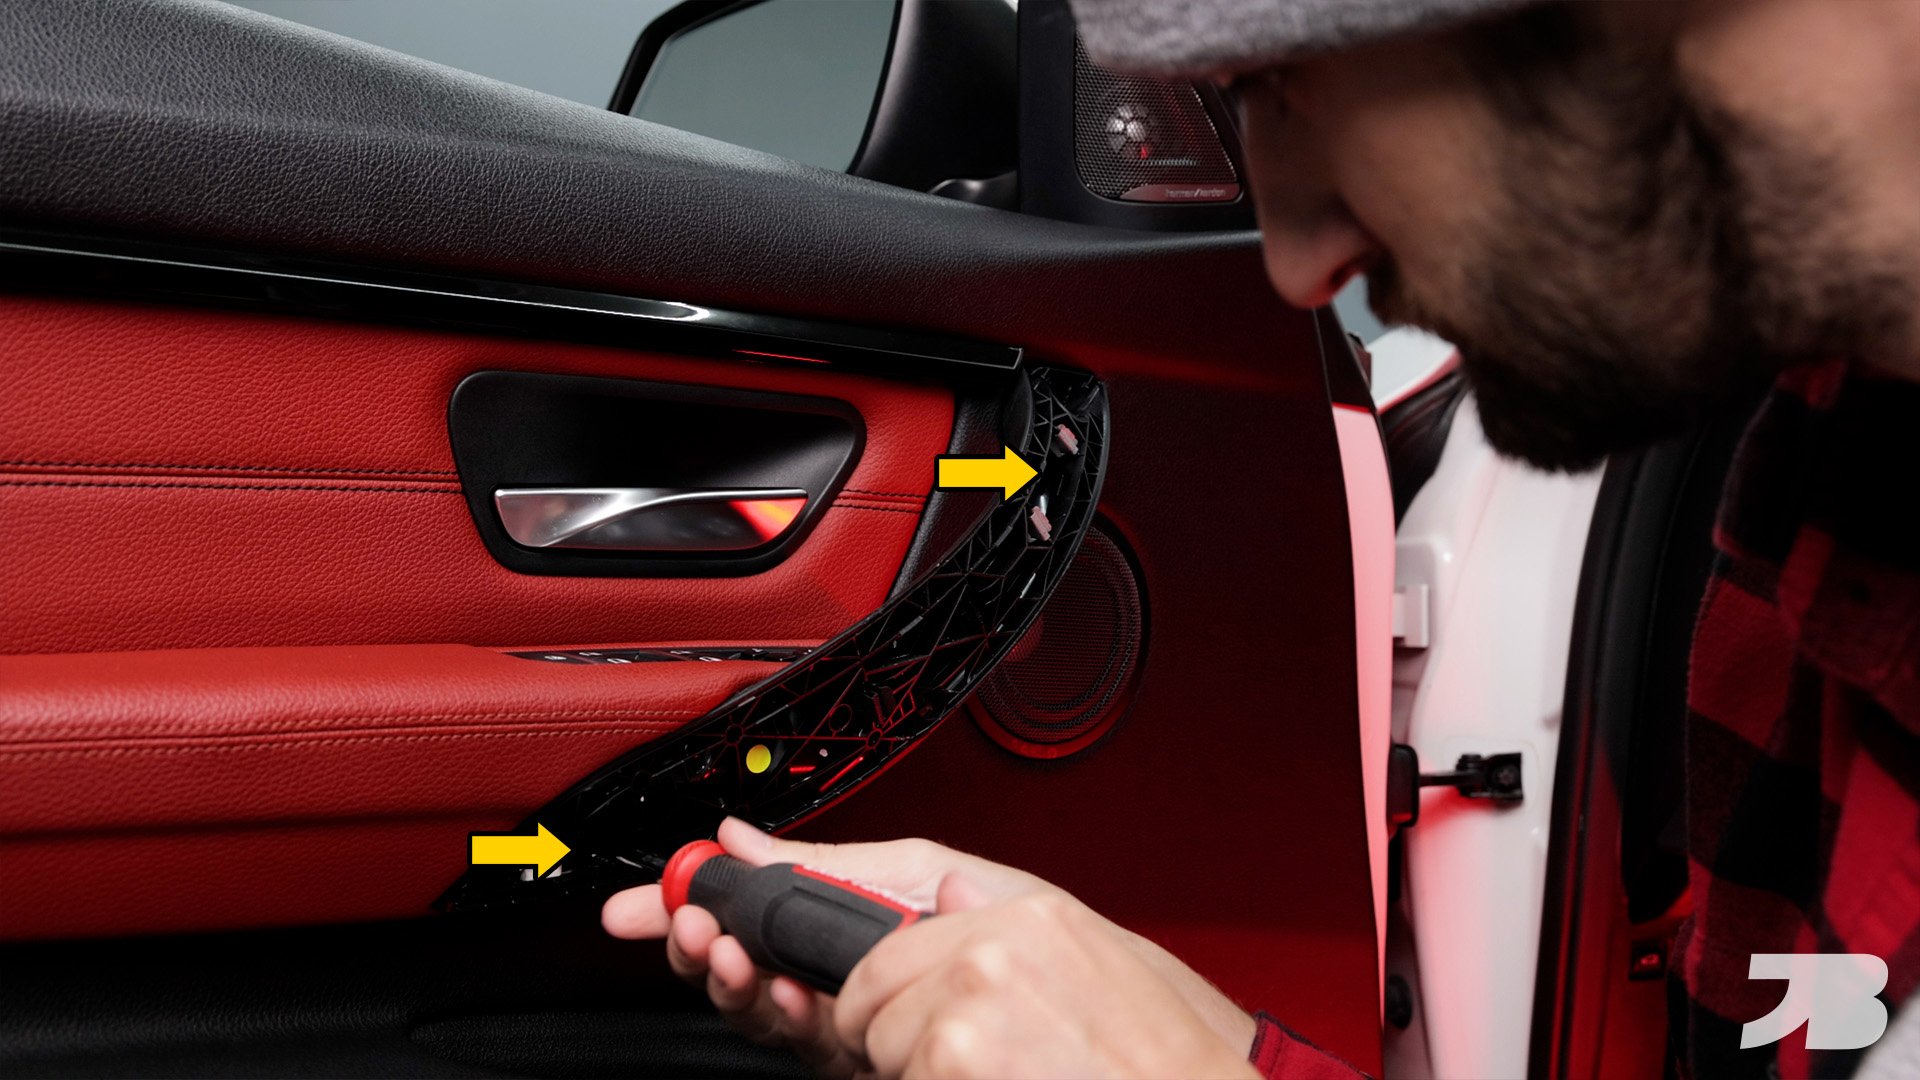
Step 2: Remove the two long black T20 screws from the door handle. These screws atattch the door panel to the metal of the door.
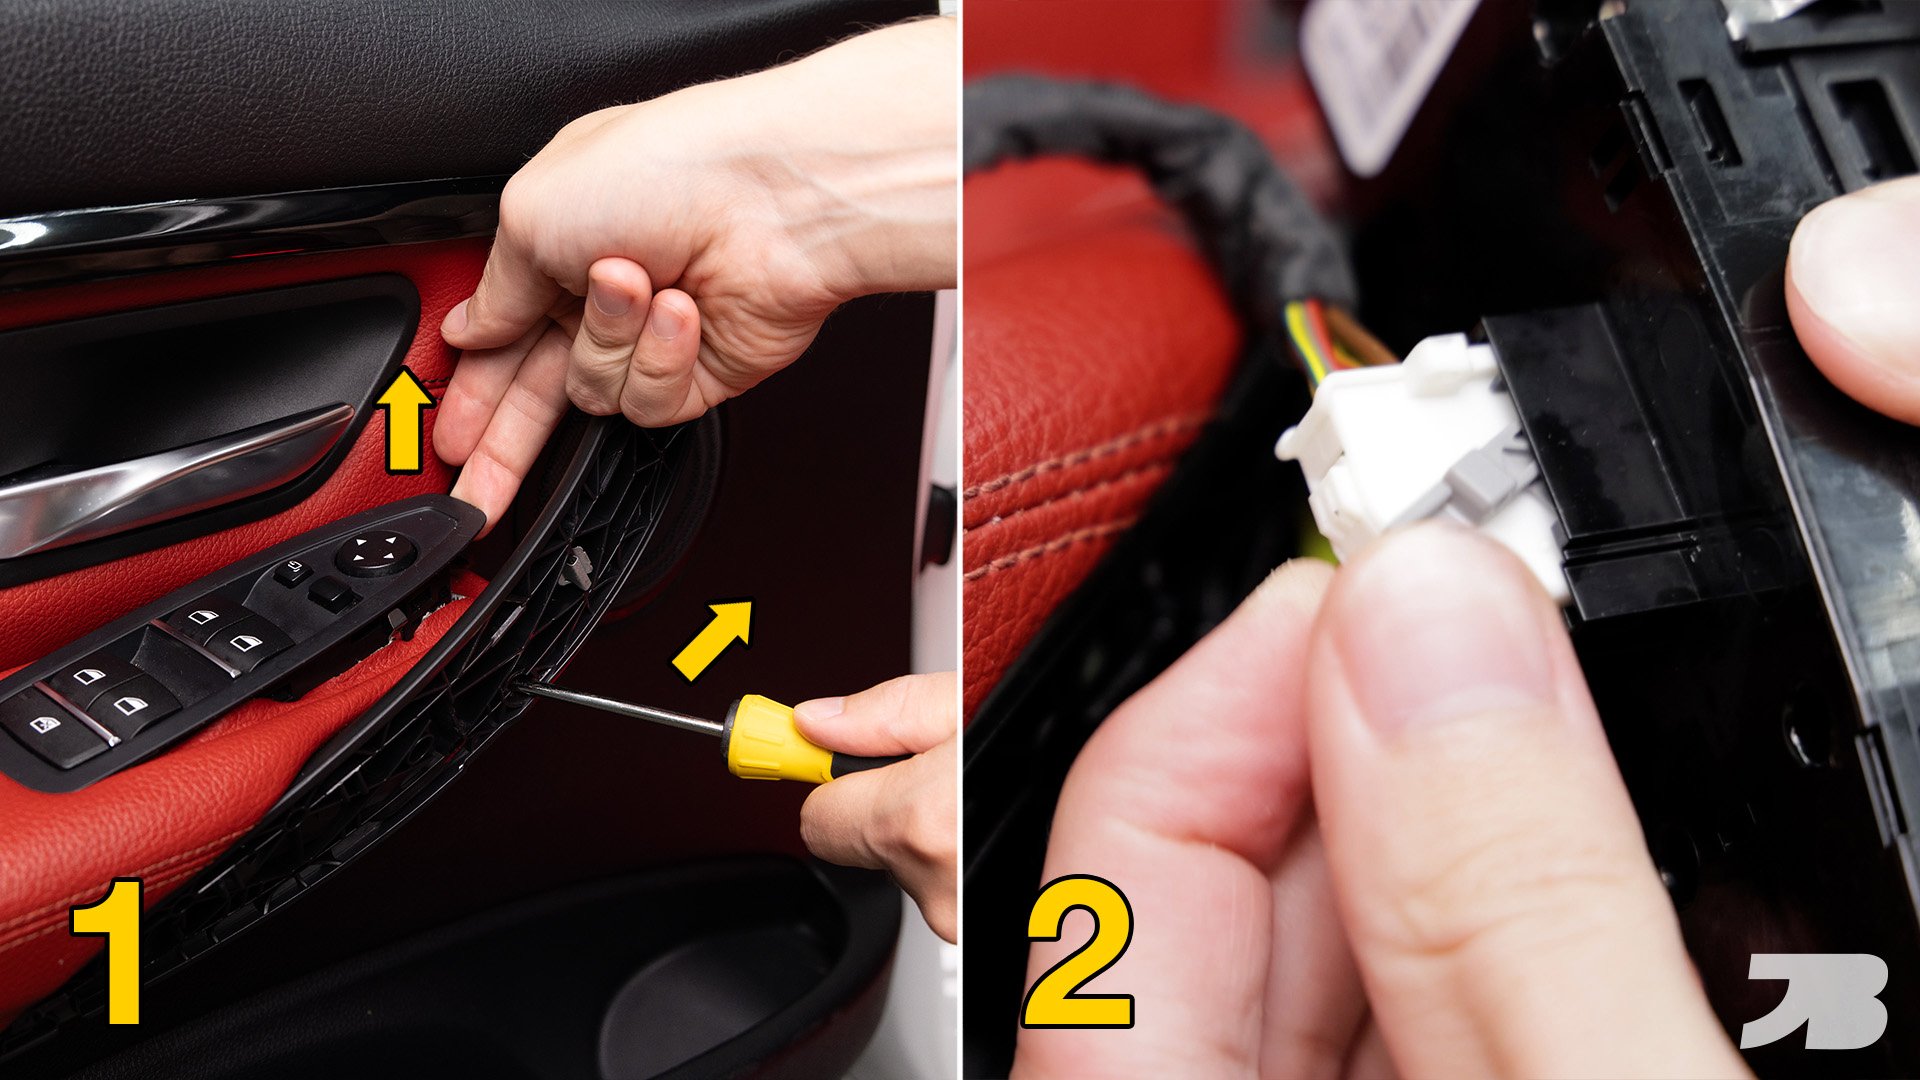
Step 3: With the trim removed, there is an access hole in the handle where you can insert a screwdriver. Press the tab in with the screwdriver while simultaneously pulling up on the switch. Lift the switch out of the door and disconnect the locking harness. (In my YouTube DIY, I released the tab from the back side which was MUCH more difficult. My subscribers were quick to point out the access hole in the front. Thanks guys!)
Step 4: Using a larger pry tool, pry off the door panel. Start at the bottom, then work your way up the sides, finishing at the top. If you’ve never removed your door panel before, the fasteners are super tight. Be mindful of the door lock indicator when lifting the panel away. Note that there are still several wiring harnesses plugged in to the panel. I set it on a 5 gallon bucket as to not put tension on the wires.
Step 5: Pull down on the white part of the cable to release the tension, then unhook the cable from the top.

Step 6: Unplug the wires for the ambient door lighting and the puddle light. Pull the harness from the window switch from the previous step through the door. With everything disconnected, you can set the door panel on the ground. I put a blanket down to protect the leather on the finished side.

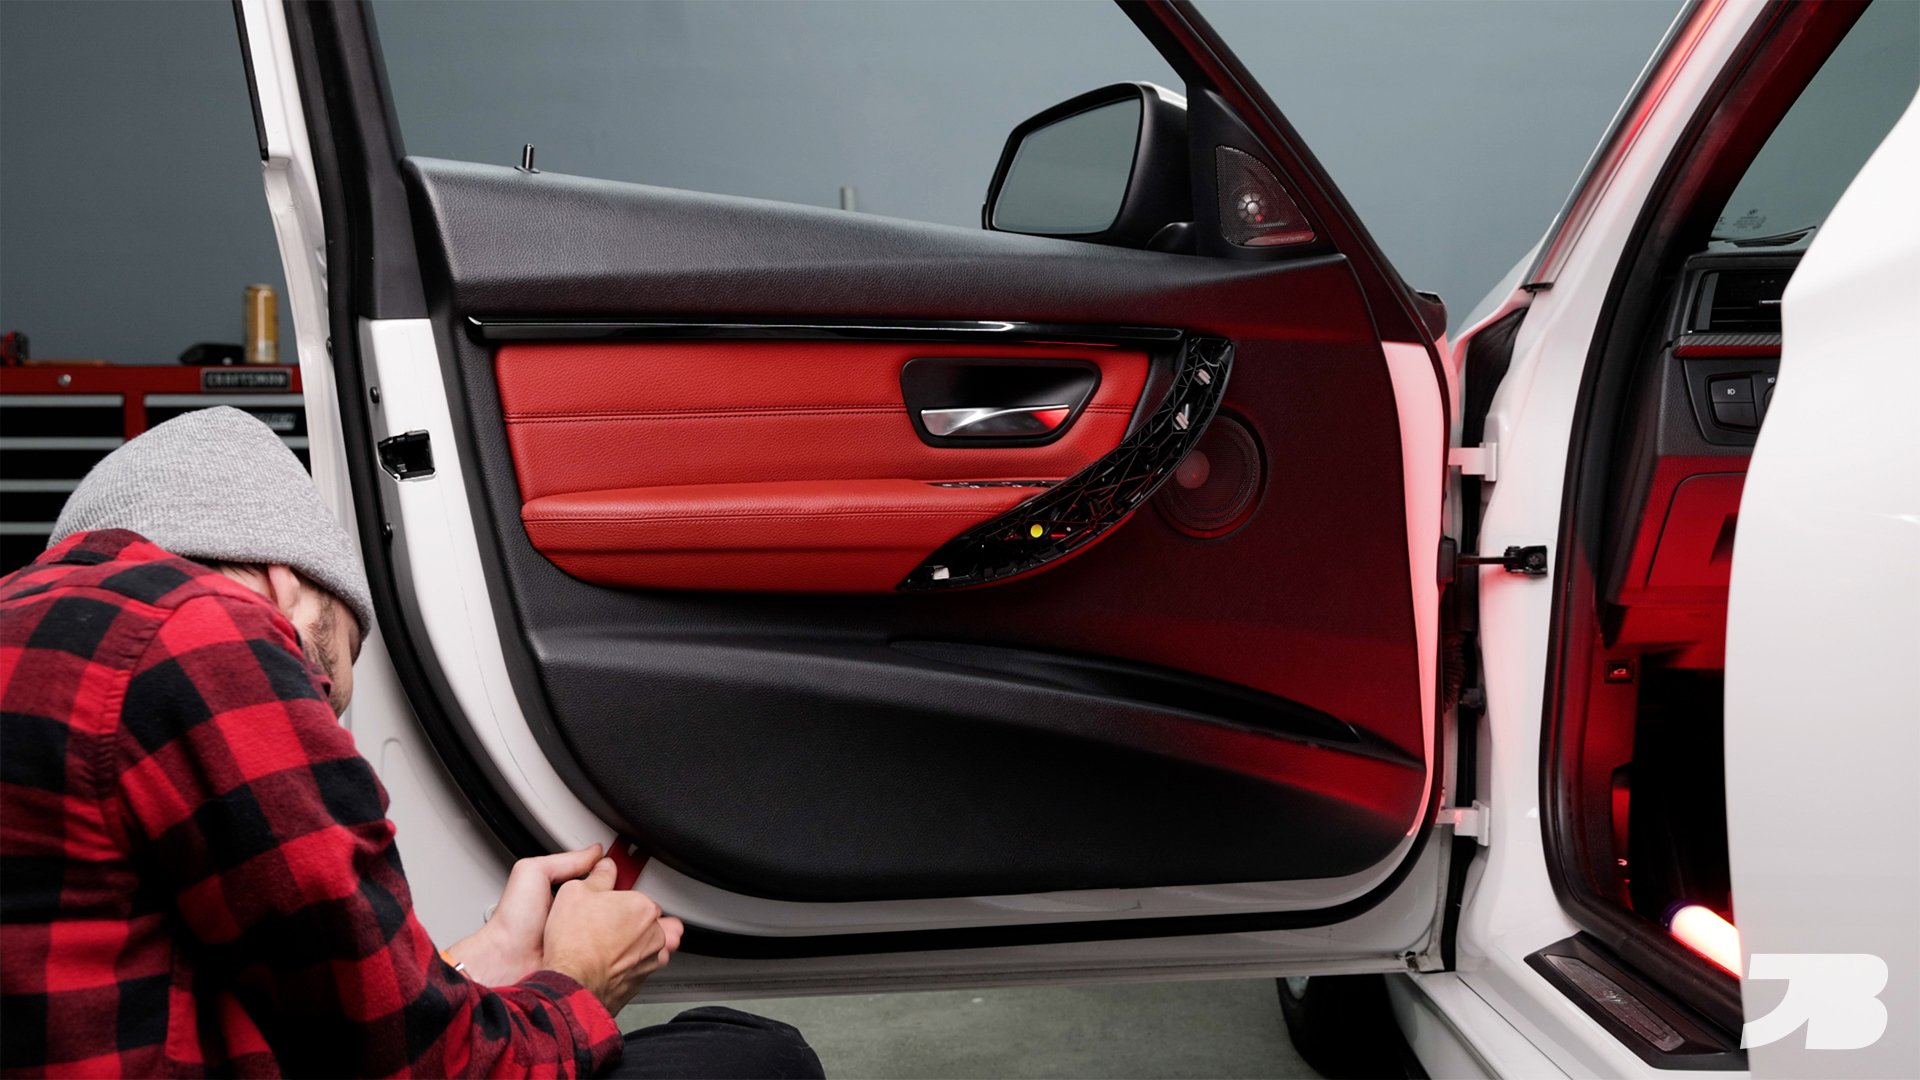
Step 7: The original door handles are held on with plastic rivets. We need to drill through them to remove them. Then the new door handles from Kies Motorsports are held on with T20 screws (provided in the door handle kit).

I used a drill with a 3/8” bit. There’s a trick to getting these off. You don’t want to drill all the way through to the other side. Instead, you’ll want to put some weight on the drill so the drill bit “bites” the plastic rivet, then with one quick burst of the drill, sheer the rivet clean off. Once all four rivets are removed, you can take the old handle off the door.

Step 8: Install the new handle on the front side of the door, then use the T20 screws from the kit to secure it from the back. Keep in mind that you are only screwing them in to plastic, so do them by hand and don’t over-tighten them.

Re-assembly: With your new handle installed, put it all back together in reverse order. Reconnect the wiring harnesses for the window switch, ambient lighting and puddle light. Re-connect the door lever cable. Before putting the door panel on, put your car in “accessory mode” and make sure all of the electronics work. Re-install the door panel starting at the top and working your way down. Re-install the two long black T20 screws into the handle and replace the trim cover.
DOOR HANDLE REPLACEMENT VIDEO
Is this guide helpful for your specific model?
This replacement process is nearly identical for the following BMW chassis:
F30: 3 Series Sedan (2012–2018)
F31: 3 Series Wagon (2012–2019)
F32: 4 Series Coupe (2014–2020)
F33/F36: 4 Series Convertible & Gran Coupe
*This blog contains affiliate links. If you click my custom link to purchase a product, I earn a small commission at no extra cost to you.